Figure and Gesture Drawing Practice Tools Figure &
Figure drawing: A beginner's guide
Source: Chris Legaspi
Great figure drawings feel alive. One of an creative person's greatest tools to communicate life in a drawing is gesture. Information technology's the front from unrivalled form to another. That's why it follows the natural flow of hominid anatomy. The first place to spirit is in the torso – where it is contracting and where it is relaxing. The easy OR stretch side is the primary gesture – the 'action line'.
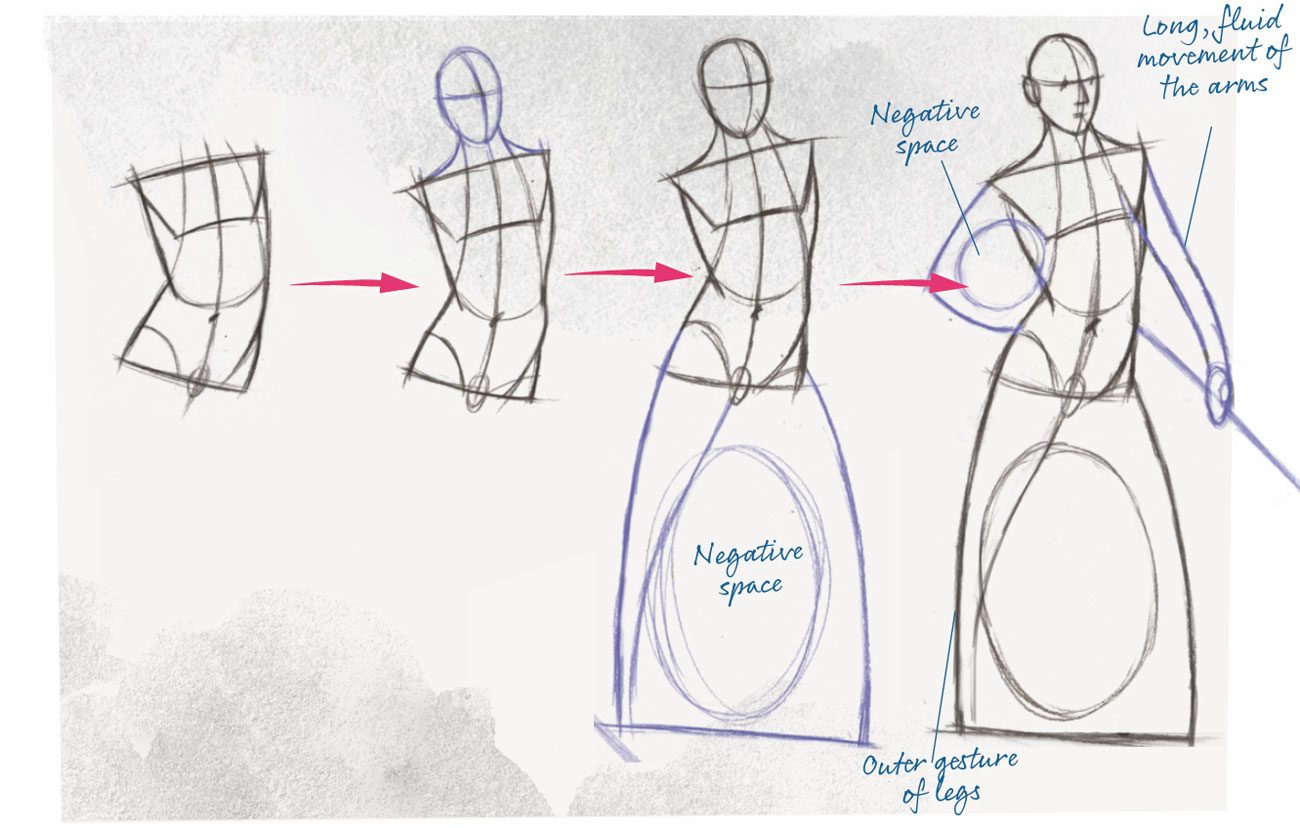
To learn gesture, I enjoy timed aliveness draft, five minutes operating room less. Begin with the action ancestry. Next connect the shoulders and the hips, then stingy the form at the arrest side. As meter permits, I add musical rhythm lines and simplify any anatomical details. With the torso established, proceed to the limbs. I use a simple oval to lay-upstairs and neck.
Side by side, I use a rhythmic gesture on the outer edge of the legs to descriptor a graphic shape. Finally, the coat of arms can be simplified into pointed, curved rectangles, with a simple oval to capture the hand. This position-in not solely communicates apparent motion, but is likewise a great base to add details, light and shading too.
01. What is gesture?
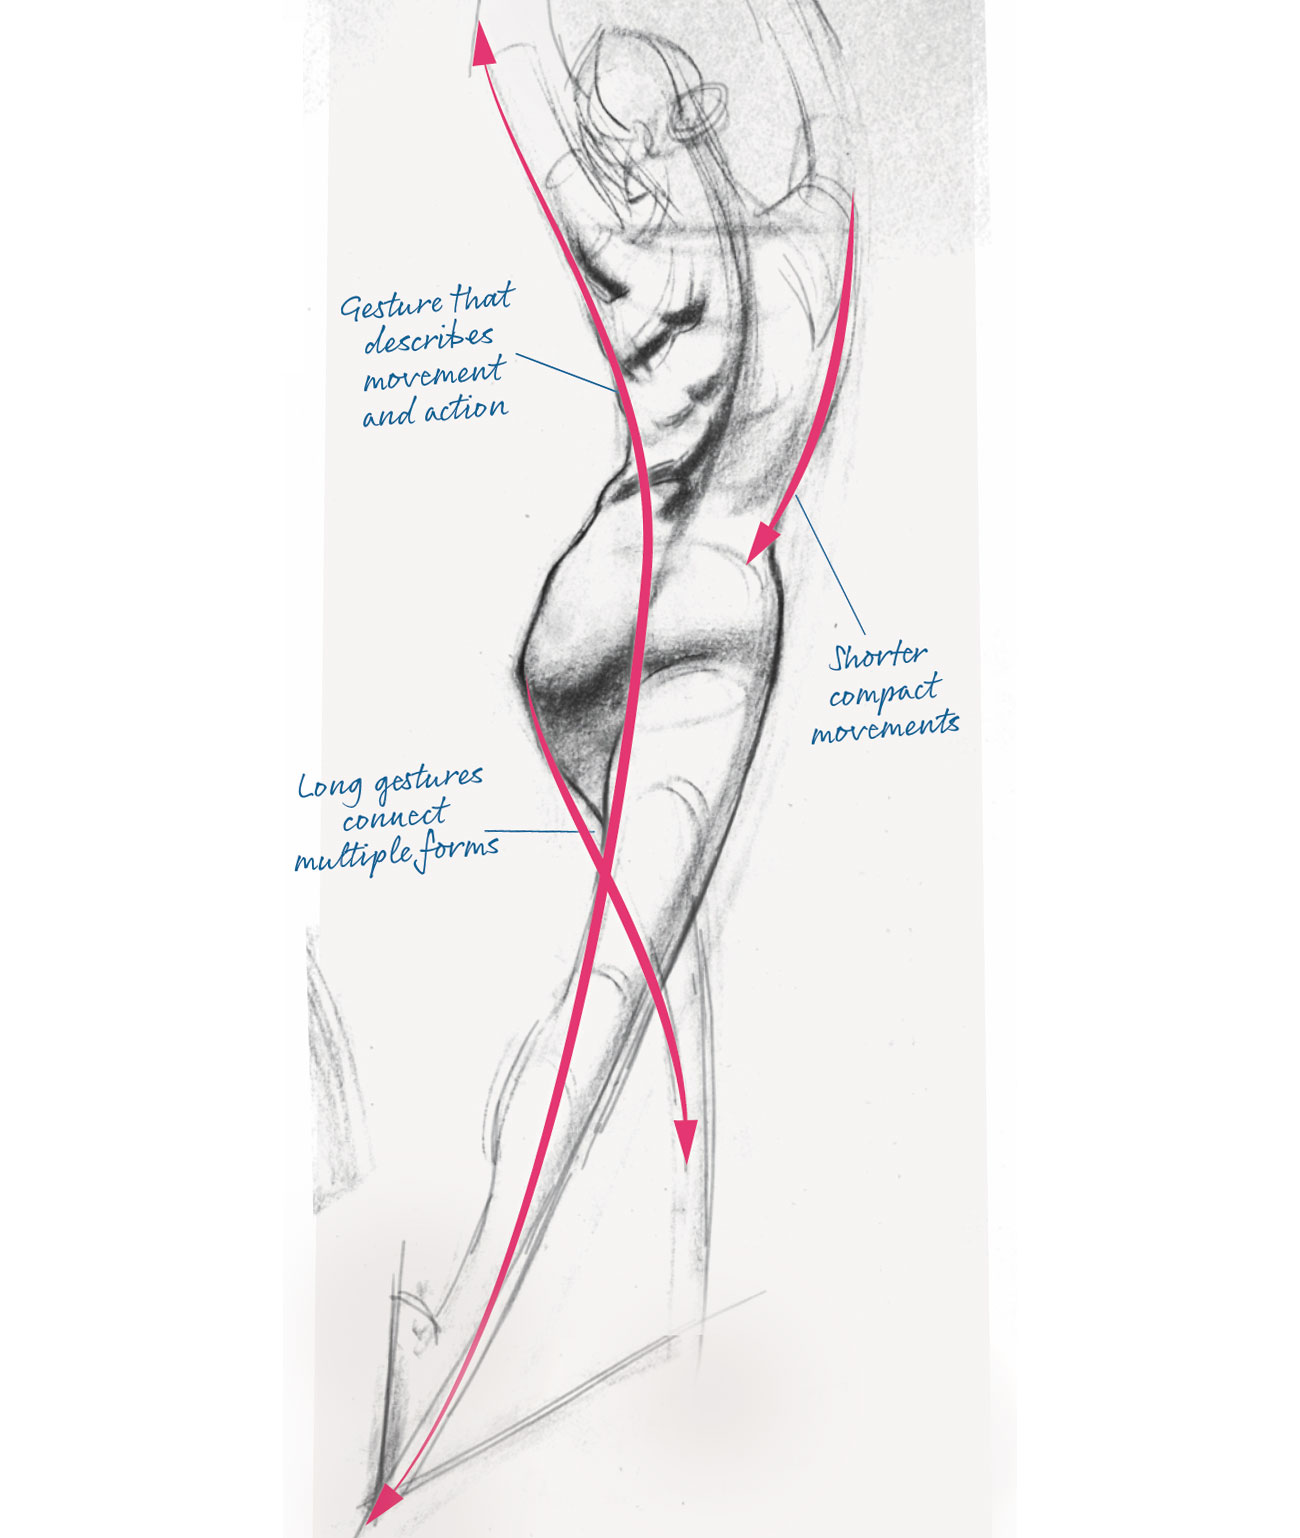
When I suck in figures, my first priority is to describe the movement. That's what motion does. IT communicates what the trope Oregon form is doing. Gesticulate also describes movement between removed forms of the body and how these forms relate to one some other. When done right, gesture can help make the illusion of a living, breathing figure.
02. Where is gesture?
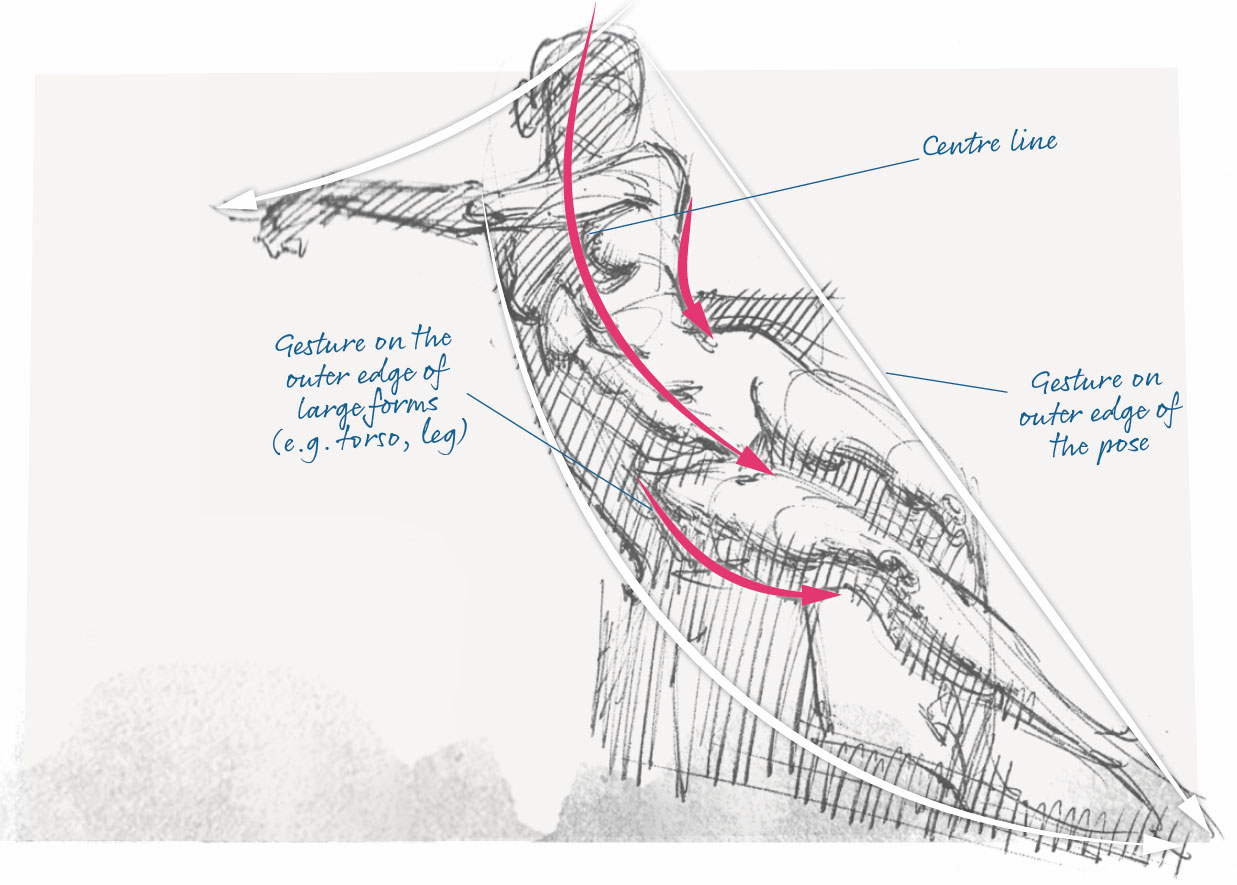
Gesture occurs all over in the personify and in many forms. E.g., gesture occurs along the outside edge of the figure and connected the larger forms like the torso and leg. Gesture likewise occurs in littler forms. For instance, the arm, carpus, palm and fingers are complete connected past gesture.
03. Exterior gesture
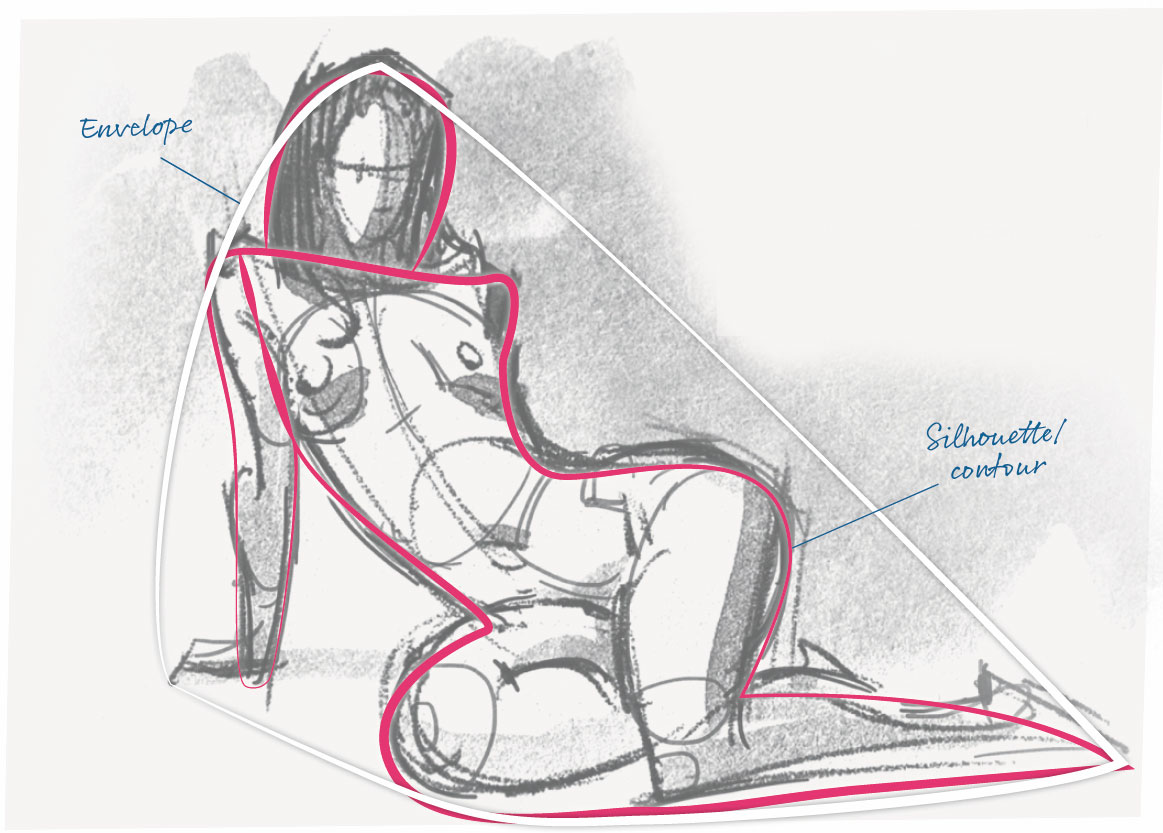
One direction to link the points of a pose is notable A an envelope. This simplifies the figure into one visual communication configuration. The second material body of out gesticulate is the silhouette operating room contour. This nearly follows the contour or edge of the figure and connects key parts like the shoulder, waist, hips and limbs
04. Interior gesture
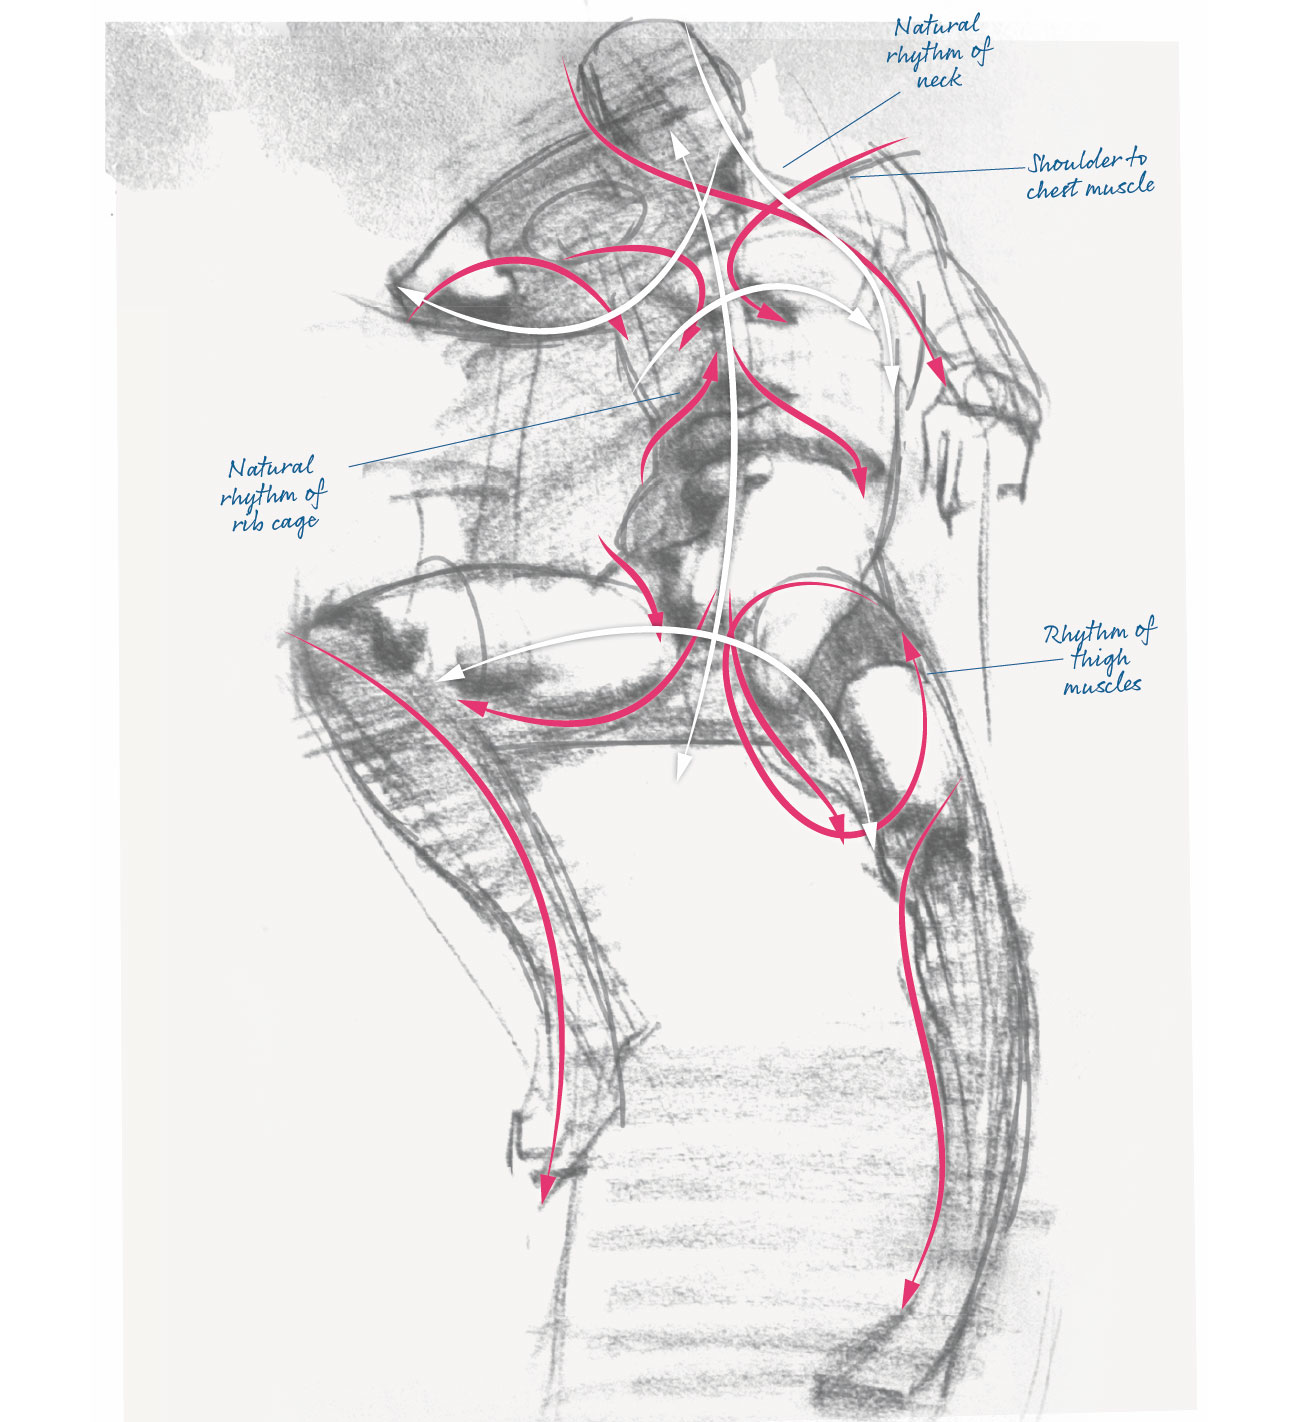
Gestures on the inside of the figure are called rhythms. Rhythms are present lines that are often supported chassis. For example, the neck flows to the shoulder, the chest flows into the arm, and the hips flow naturally to the thigh. I like to use rhythms to place anatomy and small details.
05. How to see gesture
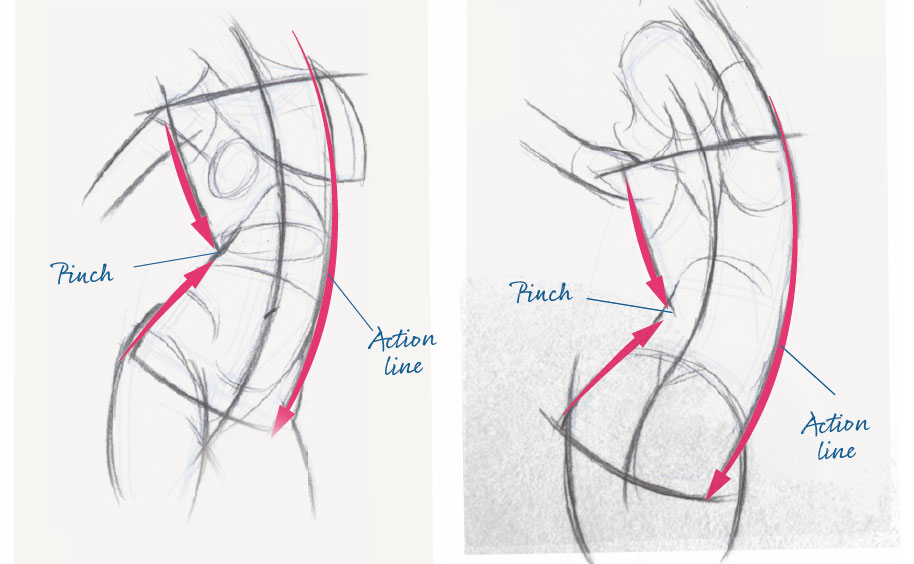
To see gesticulate, I first focus on the body and then look for key anatomical landmarks such as the shoulder joint, outer hips (great trochanter), pit of the neck opening and groin. Connecting these points reveals the action dividing line or the primary gesture of the pose, and also the muscle contraction or pinch that happens on the opposing face of the action line.
06. The action line
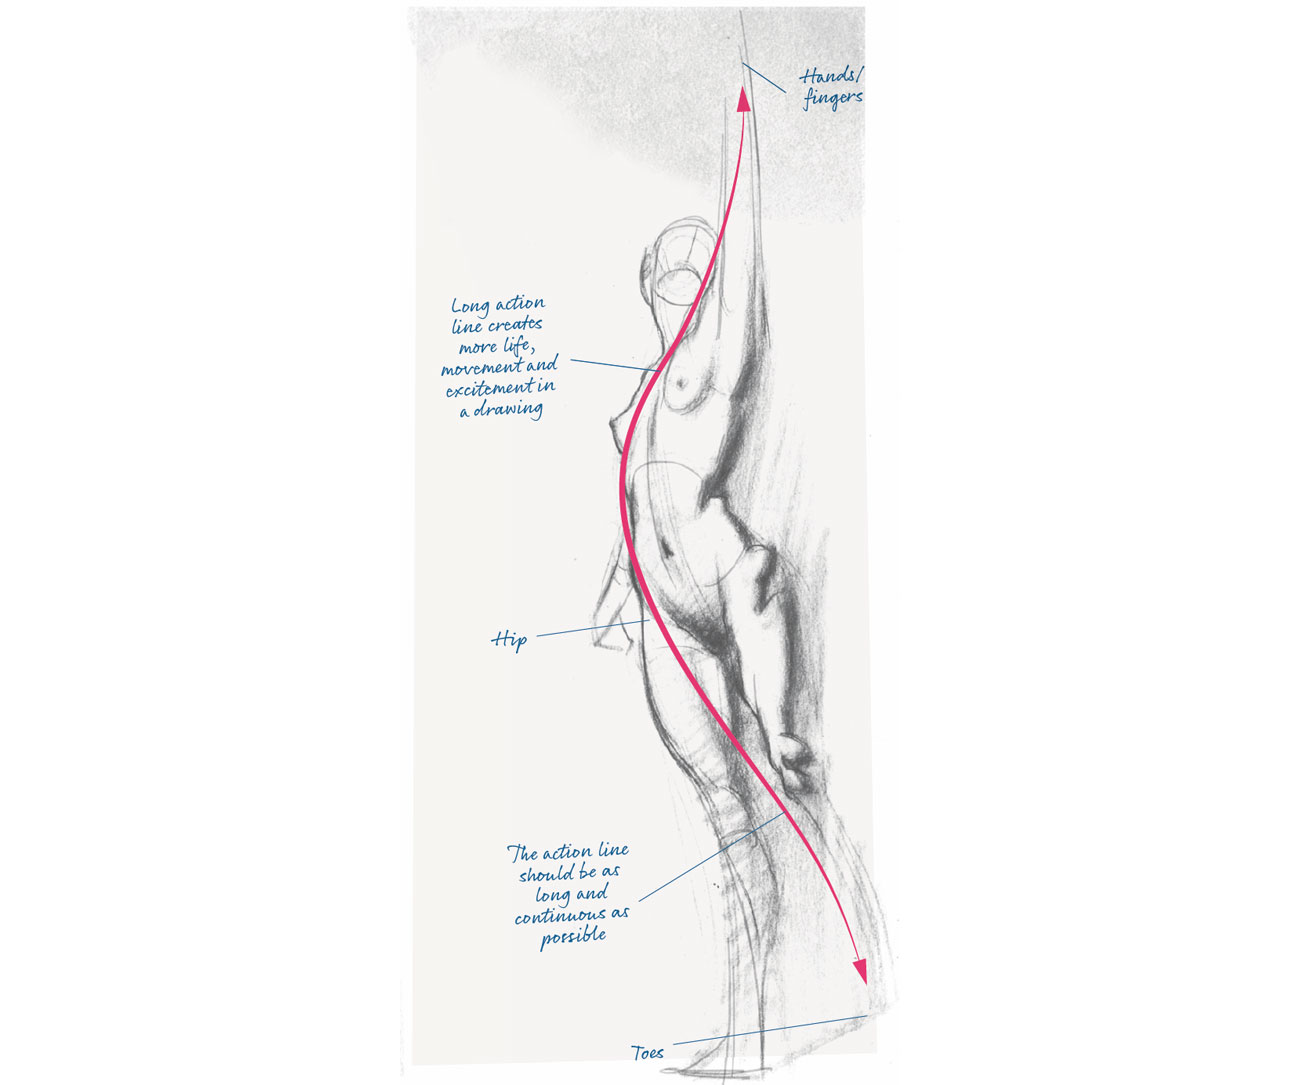
The most important gesture in any drawing is the action line, also known as the longest line operating theatre thrust. This line describes the primary campaign in the pose and should equal careworn arsenic long and fluid as possible. I use it as the initiation of the entire drawing, and every mark I lay down either reinforces or complements the action line.
07. How to make good Marks
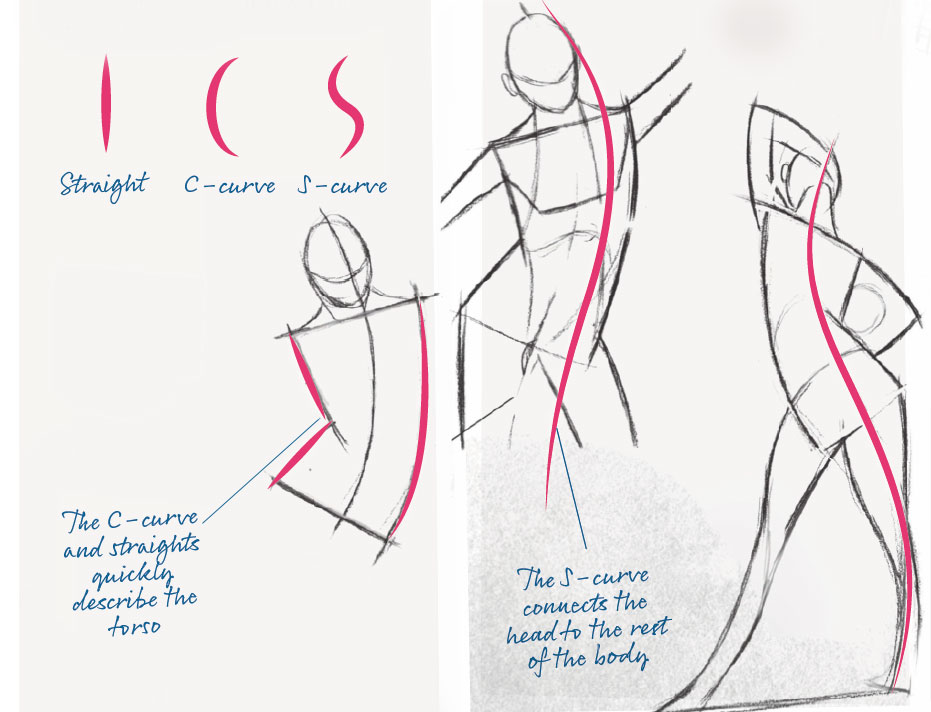
To get drawings clean and simple to read, I utilisation only three marks: straight, C-curve or S-curve. E.g., a C-curve is great for the stretch operating theater elongated side of the torso. Straights quickly connect the shoulders and hips. For the execute line, a lengthy S-curve connects the head to the legs and feet.
08. Making gesture lines longer

I draw gesture lines equally all-night, smooth and uninterrupted as possible, especially the action line. To do this, I often look into for the extremities same the fingers, toes, and the best of the head, and use gesture to connect these points. Inside the body, I use and follow the anatomy to keep the motion flowing.
09. Drawing poses: under two minutes
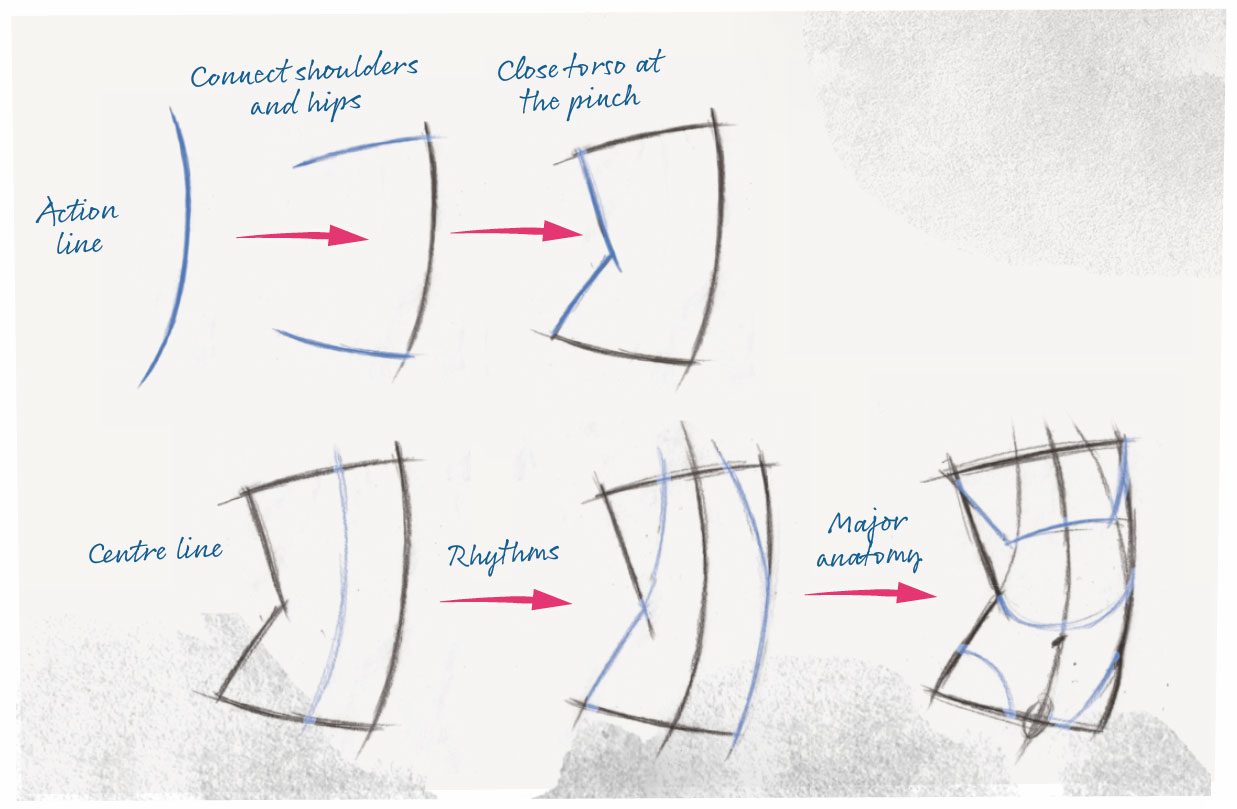
When I draw poker really short poses (deuce transactions Beaver State less), I like to low gear isolate the trunk sol I can clearly see the action line. Once I describe the natural process line, I connect the shoulders and the hips and and then closing curtain the shape at the pinch side. Following, I continue to add rhythms and prima anatomy until the allowed meter is up.
10. Drawing poses: subordinate five transactions
When drawing shortsighted poses under five minutes, I first describe the torso and past simplify the head. Next, I draw the legs as one shape, using motion to connect the hips to the feet. For the arms, I use long tapering lines that describe their outer shape and movement. A spatulate elliptical is keen for rapidly describing any negative space.
This is an edited version of advice that was originally published in ImagineFX , the world's best-selling magazine for digital artists. Subscribe here .
Blood-related articles:
- Artistic production techniques: top tutorials for painting and drawing
- Get weaving with ink drawing
- 15 experimental drawing tips
Related articles
Figure and Gesture Drawing Practice Tools Figure &
Source: https://www.creativebloq.com/how-to/how-to-begin-a-figure-drawing/3
0 Response to "Figure and Gesture Drawing Practice Tools Figure &"
Post a Comment